
How to Improve SSD Performance in Linux: Boost Speed Now!
Enable TRIM for your SSD and optimize I/O scheduler settings. Consider using the EXT4 file system for better performance.
Improving SSD performance in Linux can significantly enhance your system’s speed and efficiency. By enabling TRIM, you allow the operating system to inform the SSD which blocks of data are no longer in use, helping maintain optimal write speeds. Another essential step is adjusting the I/O scheduler settings to better suit SSDs, as traditional settings may be optimized for HDDs.
Using the EXT4 file system can also provide performance benefits over older file systems. These steps ensure that your SSD operates at its best, providing faster boot times, application launches, and overall system responsiveness. By making these adjustments, you can fully leverage the capabilities of your SSD on a Linux system.

Credit: www.cyberciti.biz
Choosing The Right File System
SSDs are known for their speed and reliability, but to get the best performance out of them on Linux, choosing the right file system is crucial. The file system manages how data is stored and retrieved, which impacts overall speed and efficiency. In this section, we’ll explore the importance of selecting a file system with TRIM support and how to optimize file system settings to enhance SSD performance.
Another Article – Is SSD Good for Long Term Storage? Unveiling the Truth
Selecting A File System With Trim Support
TRIM support is essential for SSDs. It helps the drive manage unused space, which keeps the SSD running smoothly and efficiently. The Linux kernel supports several file systems that have built-in TRIM support.
Here are some popular file systems with TRIM support:
- Ext4: The most commonly used file system in Linux. It offers good performance and stability.
- Btrfs: Known for advanced features like snapshotting and self-healing. It also supports TRIM.
- XFS: Excellent for handling large files and parallel I/O operations. It supports TRIM as well.
- F2FS: Specifically designed for NAND flash memory-based storage devices like SSDs. It offers native TRIM support.
Below is a comparison table of these file systems:
| File System | TRIM Support | Best For |
|---|---|---|
| Ext4 | Yes | General use |
| Btrfs | Yes | Advanced features |
| XFS | Yes | Large files |
| F2FS | Yes | SSD optimization |
Choosing a file system with TRIM support is the first step. It ensures your SSD remains fast and reliable over time.
Optimizing File System Settings
After selecting the right file system, optimizing its settings is crucial. This ensures you get the maximum performance from your SSD.
Here are some key optimizations:
- Enable TRIM: Make sure TRIM is enabled. You can add the following line to your /etc/fstab file:
UUID=your-uuid /mount-point ext4 defaults,noatime,discard 0 1Replaceyour-uuidwith your drive’s UUID and/mount-pointwith the mount point. - Disable Access Time Logging: This reduces unnecessary write operations. Add
noatimeto your mount options:UUID=your-uuid /mount-point ext4 defaults,noatime 0 1 - Use a Swap File Instead of a Swap Partition: A swap file is more flexible and reduces wear on the SSD. Create a swap file with the following commands:
sudo fallocate -l 4G /swapfile sudo chmod 600 /swapfile sudo mkswap /swapfile sudo swapon /swapfileAdd this line to /etc/fstab to make it permanent:/swapfile none swap sw 0 0
These optimizations help prolong the life of your SSD and ensure it runs at peak performance. Regular maintenance and monitoring are also important to keep your system running smoothly.
Credit: tributorecords.com
Enabling Trim Support
Improving SSD performance in Linux involves several steps, but enabling TRIM support is critical. TRIM helps maintain the SSD’s speed over time by ensuring deleted files are truly erased. This guide will help you understand and activate TRIM support to keep your SSD running smoothly.
Understanding Trim Functionality
TRIM is a command that allows the operating system to inform the SSD which blocks of data are no longer needed. This prevents the SSD from slowing down as it ages. Here are the key points to understand:
- Efficiency: TRIM helps the SSD manage unused data blocks, enhancing its efficiency.
- Longevity: By reducing unnecessary write operations, TRIM extends the SSD’s lifespan.
- Performance: Regular TRIM commands help the SSD maintain optimal performance levels.
Without TRIM, SSDs can become cluttered with old data, leading to slower write operations. Let’s illustrate how TRIM works:
| Before TRIM | After TRIM |
|---|---|
| Deleted data remains in blocks | Blocks are cleared and ready for new data |
| Slower write speeds over time | Consistent write speeds |
Understanding TRIM’s functionality can help you appreciate its importance for SSD maintenance and performance.
Activating Trim Support
Enabling TRIM support in Linux is straightforward. Follow these steps to ensure your SSD benefits from TRIM:
- Check if your SSD supports TRIM: Run the command below in your terminal:
sudo hdparm -I /dev/sdX | grep TRIMReplace/dev/sdXwith your SSD’s device name. Look for “Data Set Management TRIM supported”. - Edit the fstab file: Add the
discardoption to your SSD’s mount entry. Open/etc/fstabwith a text editor:sudo nano /etc/fstabAdddiscardto the options list for your SSD. It should look like this:/dev/sdX /mount/point ext4 defaults,discard 0 1 - Enable periodic TRIM: Periodic TRIM runs automatically at scheduled intervals. Enable it by running:
sudo systemctl enable fstrim.timerStart the timer with:sudo systemctl start fstrim.timer
These steps help you activate TRIM support and ensure your SSD stays clean and fast.
Adjusting I/o Scheduler
Boosting SSD performance in Linux can make your system faster and more efficient. One of the best ways to enhance performance is by adjusting the I/O scheduler. The I/O scheduler determines how read and write operations are handled by the SSD. By choosing the right scheduler, you can significantly improve your SSD’s speed and responsiveness.
Exploring Different I/o Schedulers
Linux offers several I/O schedulers, each with unique characteristics. Understanding these schedulers is key to optimizing your SSD performance:
- CFQ (Completely Fair Queuing): Distributes I/O requests from different processes fairly. Good for systems with multiple users.
- Deadline: Prioritizes I/O requests to meet deadlines. Reduces latency, ideal for SSDs.
- NOOP: Uses a simple FIFO queue. Best suited for SSDs as they handle their own internal scheduling.
- BFQ (Budget Fair Queuing): Allocates bandwidth based on process budgets. Suitable for media applications.
Here’s a quick comparison table:
| Scheduler | Best For | Characteristics |
|---|---|---|
| CFQ | Multi-user systems | Fair distribution of I/O requests |
| Deadline | SSDs | Low latency, prioritizes deadlines |
| NOOP | SSDs | Simple FIFO queue |
| BFQ | Media applications | Bandwidth allocation based on budgets |
Changing The I/o Scheduler
Switching to an optimal I/O scheduler is straightforward. Follow these steps to change the I/O scheduler for your SSD:
- Identify your SSD: Open a terminal and type
lsblk. Note the name of your SSD, likesdaornvme0n1. - Check the current scheduler: Use
cat /sys/block//queue/scheduler. This shows the active scheduler. - Change the scheduler: To switch to a different scheduler, run
echo scheduler_name | sudo tee /sys/block//queue/scheduler. Replacescheduler_namewith your chosen scheduler (cfq, deadline, noop, bfq).
Here’s an example command to change to the NOOP scheduler:
echo noop | sudo tee /sys/block/sda/queue/schedulerTo make this change permanent, add the following line to your /etc/default/grub file:
GRUB_CMDLINE_LINUX_DEFAULT="elevator=noop"Then update GRUB with:
sudo update-grubReboot your system to apply the changes.

Credit: www.tomshardware.com
Monitoring Disk Usage
Improving SSD performance in Linux involves several steps, and one crucial aspect is monitoring disk usage. Effective monitoring helps identify issues early and ensures your SSD runs at its best. By regularly checking disk performance, you can detect and fix bottlenecks before they become significant problems.
Using Tools To Monitor Disk Performance
Linux offers several tools to monitor disk performance. These tools provide valuable insights into how your SSD is performing. iostat is a command-line tool that helps you monitor system input/output device loading. It provides detailed information about CPU and device utilization.
Here’s how to use iostat:
sudo apt-get install sysstat
iostat -d -x 1 10
The above command shows extended statistics for each device every second for 10 seconds.
Another useful tool is iotop. It displays a list of processes that are performing I/O operations. This helps identify which processes are causing high I/O.
To install and use iotop:
sudo apt-get install iotop
sudo iotop
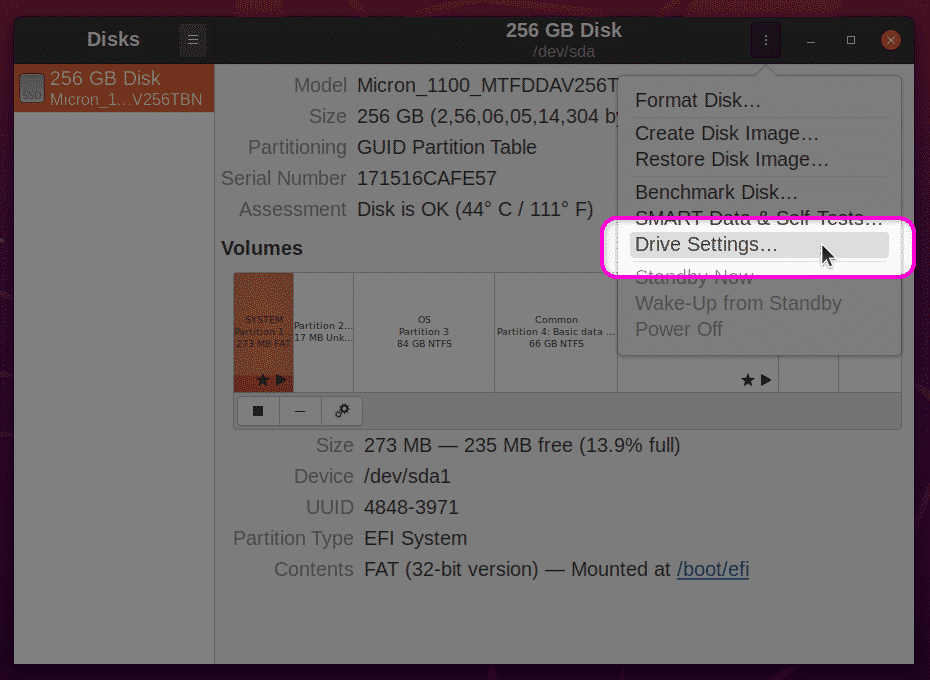
You can also use the gnome-disk-utility for a graphical interface to monitor disk performance. It provides a user-friendly way to view disk usage and performance metrics.
To install gnome-disk-utility:
sudo apt-get install gnome-disk-utility
gnome-disks
Identifying Performance Bottlenecks
Identifying performance bottlenecks is crucial for maintaining optimal SSD performance. Bottlenecks can occur due to various reasons, such as high I/O wait times or excessive disk usage by specific processes.
Use iostat to check for high I/O wait times. Look for high percentages in the %iowait column. High values indicate that the CPU is waiting for I/O operations to complete.
Here’s an example output:
Device:         rrqm/s   wrqm/s     r/s     w/s    rMB/s    wMB/s avgrq-sz avgqu-sz   await  svctm  %util
sda               0.00     5.00    0.00    7.00     0.00     0.03     8.00     0.00    0.00   0.00   0.00
In this output, check the await and %util columns. High values in these columns indicate potential bottlenecks.
Using iotop, identify processes causing high disk usage. Look for processes with high DISK WRITE or DISK READ values.
Here’s an example of iotop output:
PID  USER     DISK READ  DISK WRITE  SWAPIN     IO>    COMMAND
1234  root     0.00 B/s   1.23 MB/s   0.00 %     0.00 %  someprocess
From this output, you can see which processes are using the most I/O resources. If a particular process is causing high disk usage, consider optimizing or limiting its activity.
Utilizing Swap Space Efficiently
Maximizing SSD performance in Linux involves many strategies. One key aspect is utilizing swap space efficiently. Swap space acts as an overflow area for your RAM. When RAM is full, your system moves idle pages to the swap space. Efficient use of swap space ensures your SSD runs smoothly and prolongs its lifespan.
Configuring Swap Space For Ssds
To configure swap space for SSDs, follow these steps. First, ensure you have a swap partition or swap file. A swap file is easier to manage and resize. Use the fallocate command to create a swap file:
sudo fallocate -l 4G /swapfileThis command creates a 4GB swap file. Next, secure the swap file by setting the correct permissions:
sudo chmod 600 /swapfileFormat the file for swap space:
sudo mkswap /swapfileEnable the swap file:
sudo swapon /swapfileFinally, add the swap file to /etc/fstab to enable it at boot:
echo '/swapfile none swap sw 0 0' | sudo tee -a /etc/fstabSetting the right swappiness value is crucial. Swappiness controls how often your system swaps data from RAM to swap space. For SSDs, a lower swappiness value is better. Use the following command to set swappiness to 10:
sudo sysctl vm.swappiness=10To make this change permanent, add the following line to /etc/sysctl.conf:
vm.swappiness=10Avoiding Unnecessary Swap Usage
Avoiding unnecessary swap usage keeps your SSD in good shape. First, monitor your system’s swap usage. Use the free -h command to check memory and swap usage:
free -hDisable swap temporarily if you don’t need it. Use the following command:
sudo swapoff -aCheck your system’s swappiness setting. If it’s too high, your system may use swap space too frequently. Use the following command to check swappiness:
cat /proc/sys/vm/swappinessIf the value is high, lower it to reduce swap usage. A swappiness value of 10 is generally good for SSDs:
echo 'vm.swappiness=10' | sudo tee -a /etc/sysctl.confAnother way to avoid unnecessary swap usage is to optimize your applications. Close unused applications to free up RAM. Use lightweight applications that consume less memory. Monitor your applications’ memory usage with the top or htop command:
tophtopFinally, increase your RAM if possible. More RAM reduces the need for swap space. Follow these tips to efficiently use swap space and boost your SSD’s performance on Linux.
Implementing Raid Configuration
Improving SSD performance in Linux can significantly enhance your system’s speed and reliability. One effective way to achieve this is by implementing a RAID configuration. RAID, or Redundant Array of Independent Disks, combines multiple SSDs to improve performance and data redundancy. Below, we will explore the steps for setting up RAID and the different RAID levels suitable for SSDs.
Setting Up Raid For Improved Performance
Setting up RAID on your Linux system requires some preparation. Follow these steps to get started:
- Check Compatibility: Ensure your SSDs and motherboard support RAID configuration.
- Backup Data: Backup all important data to prevent loss during the setup.
- Install RAID Software: Use tools like
mdadmto configure RAID on Linux.
To install mdadm, use the following command:
sudo apt-get install mdadmAfter installation, create a RAID array using the command:
sudo mdadm --create --verbose /dev/md0 --level=0 --raid-devices=2 /dev/sda /dev/sdbIn this example, /dev/sda and /dev/sdb are the two SSDs used to form the RAID array.
Once the RAID array is created, format it using:
sudo mkfs.ext4 /dev/md0Finally, mount the RAID array:
sudo mount /dev/md0 /mntUnderstanding Raid Levels For Ssds
Different RAID levels offer various benefits. Here’s a quick overview:
| RAID Level | Description | Performance | Redundancy |
|---|---|---|---|
| RAID 0 | Stripes data across multiple SSDs | High | None |
| RAID 1 | Mirrors data across SSDs | Moderate | High |
| RAID 5 | Stripes data with parity | Good | High |
| RAID 10 | Combines RAID 0 and RAID 1 | Very High | Very High |
RAID 0 offers the best performance by splitting data across multiple SSDs. It’s ideal for tasks requiring high-speed read and write operations. However, it lacks redundancy, meaning data loss is possible if one drive fails.
RAID 1 mirrors data across two or more SSDs, providing excellent redundancy. It’s perfect for systems where data integrity is crucial. The performance is moderate as it duplicates the data on each SSD.
RAID 5 balances performance and redundancy by using striping with parity. This setup requires at least three SSDs and offers improved read performance with good fault tolerance.
RAID 10 combines RAID 0 and RAID 1, offering both high performance and redundancy. This configuration requires a minimum of four SSDs and is ideal for critical systems needing both speed and data protection.
Updating Firmware
Improving SSD performance in Linux is crucial for a seamless computing experience. One effective way to enhance your SSD’s efficiency is by updating its firmware. Firmware updates can resolve bugs, enhance performance, and ensure compatibility with the latest hardware and software. In this section, we’ll discuss the importance of firmware updates and provide step-by-step instructions on how to update your SSD firmware in Linux.
Importance Of Firmware Updates
Firmware updates are essential for keeping your SSD in top condition. Here are some key reasons why updating firmware is crucial:
- Bug Fixes: Manufacturers release firmware updates to fix known bugs that may cause performance issues or data loss.
- Performance Enhancements: New firmware versions often include optimizations that can improve read and write speeds, leading to a more responsive system.
- Security Patches: Firmware updates can address security vulnerabilities, protecting your data from potential threats.
- Compatibility: Updates ensure that your SSD remains compatible with the latest hardware and software, reducing the risk of compatibility issues.
Neglecting firmware updates can lead to suboptimal performance and potential data integrity issues. Keeping your SSD firmware up-to-date ensures you get the best performance and reliability from your device.
Steps To Update Ssd Firmware
Updating your SSD firmware in Linux involves a few steps. Follow these instructions to ensure a smooth update process:
- Identify Your SSD Model: Open a terminal and use the following command to list your storage devices:
lsblk -dNote the name of your SSD (e.g., /dev/sda). - Check Current Firmware Version: Use the following command to check the current firmware version of your SSD:
sudo smartctl -a /dev/sda | grep 'Firmware Version' - Visit Manufacturer’s Website: Go to the SSD manufacturer’s website and navigate to the support or downloads section. Find the latest firmware for your SSD model.
- Download the Firmware Update: Download the firmware update file and any accompanying update tools or instructions.
- Create a Bootable USB Drive: If the update requires a bootable USB drive, use a tool like Rufus or UNetbootin to create one.
- Backup Your Data: Before proceeding with the update, back up all important data to avoid any potential data loss.
- Update Firmware: Follow the manufacturer’s instructions to update the firmware. This may involve booting from the USB drive and running a specific update tool.
- Verify Update: After the update, verify the new firmware version using the smartctl command:
sudo smartctl -a /dev/sda | grep 'Firmware Version'
By following these steps, you can ensure that your SSD firmware is up-to-date, leading to improved performance and reliability. Regularly checking for firmware updates can help maintain your SSD’s optimal performance in a Linux environment.
Optimizing System Settings
Improving SSD performance in Linux is crucial for faster data access and system efficiency. Optimizing system settings can significantly enhance SSD speed and longevity. Let’s dive into some practical steps to achieve this.
Tweaking Kernel Parameters
Adjusting kernel parameters can boost SSD performance. The kernel is the core of the Linux OS, managing hardware and system processes. Tweaking kernel parameters involves modifying settings in the /etc/sysctl.conf file.
Here are some key parameters to adjust:
- vm.swappiness: This parameter controls swap space usage. Set it to a low value like
10to reduce swapping and improve SSD performance. - vm.dirty_ratio: This parameter defines the maximum amount of system memory that can be filled with dirty pages before they are written to disk. Setting it to a lower value, such as
15, can enhance SSD performance. - vm.dirty_background_ratio: This parameter dictates the percentage of memory that can be filled with dirty pages before background writing starts. A value of
5is generally recommended for SSDs.
To apply these settings, add the following lines to your /etc/sysctl.conf file:
vm.swappiness=10
vm.dirty_ratio=15
vm.dirty_background_ratio=5
After editing the file, apply the changes with the command:
sudo sysctl -pThese tweaks help in reducing unnecessary disk writes, thus boosting SSD performance.
Disabling Unnecessary Services
Unnecessary services can slow down your system and degrade SSD performance. Disabling these services frees up system resources and reduces disk writes.
To identify and disable unnecessary services, follow these steps:
- List running services: Use the command
systemctl list-units --type=serviceto see all active services. - Identify unnecessary services: Check for services that you do not use. Common examples include
bluetooth.serviceandcups.service(printer service). - Disable unwanted services: Use the command
sudo systemctl disable [service_name]to disable a service. For example,sudo systemctl disable bluetooth.service.
Here’s a table with some common services you might consider disabling:
| Service Name | Description |
|---|---|
| bluetooth.service | Bluetooth support |
| cups.service | Printer service |
| avahi-daemon.service | Network service discovery |
Disabling these services can lead to a noticeable improvement in SSD performance, allowing your system to run faster and more efficiently.
Frequently Asked Questions
How Can I Speed Up My Ssd On Linux?
To speed up your SSD on Linux, enable TRIM support. Use the `fstrim` command to manually trim unused blocks. Additionally, ensure your file system is optimized for SSDs and avoid unnecessary writes.
Does Linux Support Ssd Trim?
Yes, Linux supports SSD TRIM. You can enable TRIM by running the `fstrim` command. To automate this, set up a cron job or enable fstrim. timer on systems using `systemd`.
Which File System Is Best For Ssd On Linux?
The best file systems for SSDs on Linux are ext4, Btrfs, and XFS. Ext4 is widely used and stable. Btrfs offers advanced features like snapshots. XFS is excellent for handling large files.
How Do I Check Ssd Health In Linux?
To check SSD health in Linux, use the `smartctl` command from the `smartmontools` package. This tool provides detailed health and performance information. Run `sudo smartctl -a /dev/sdX` to view the SSD’s health status.
Conclusion
Boosting SSD performance in Linux is straightforward with the right steps. Regular maintenance, optimizing settings, and using efficient tools can greatly enhance speed. Implement these strategies to ensure your SSD runs smoothly and efficiently. Stay updated with the latest Linux optimizations for continued performance improvements.
Your SSD will thank you!